Showing posts with label create. Show all posts

Thursday, February 14, 2013

Crazyon crayon hearts

So I've never been big on Valentine's Day. Even when Elmer and I were dating and everything looked like love. It's just become another crazy consumer holiday to get sucked into. But the spirit of a seven year old can really make you feel different about love. It is really so great to be seven.
 
If more of the world could operate on the spirit of a seven year old, it would be a better place. Be happy, be nice, share, love. If you're not having fun, do something else. And love unconditionally, because you don't know understand about boyfriends and girlfriends and societies expectations.... or does that stop at 4? Anyway,...
 
We made homemade Valentine's for first and fourth graders last night.  We hadn't made class Valentine Cards since Tigo was in 1st grade, three years ago (and those were AMAZING, by the way). When we were in New Mexico the kids' school didn't celebrate Valentine's Day, so no one was obliged to receive our home made crafts from mid-winter craziness. So this week I was feeling crafty, therefore the kids had no choice to be crafty as well. In the usual style of waiting until the night before the party to prepare, I decided that we would try for the hip "make broken crayons into a heart shaped crayon" to show our love. It's totally easy, fast and lots of fun I was told...... Well not so easy, pretty messy, definitely not fast, and well, still pretty fun.

I felt like I was up to the wee hours of the morning helping put these together. You know, 9:30pm is the wee hours of the night when you want your kid in bed on a school night. But these were created with love and sent on their way this morning.
 

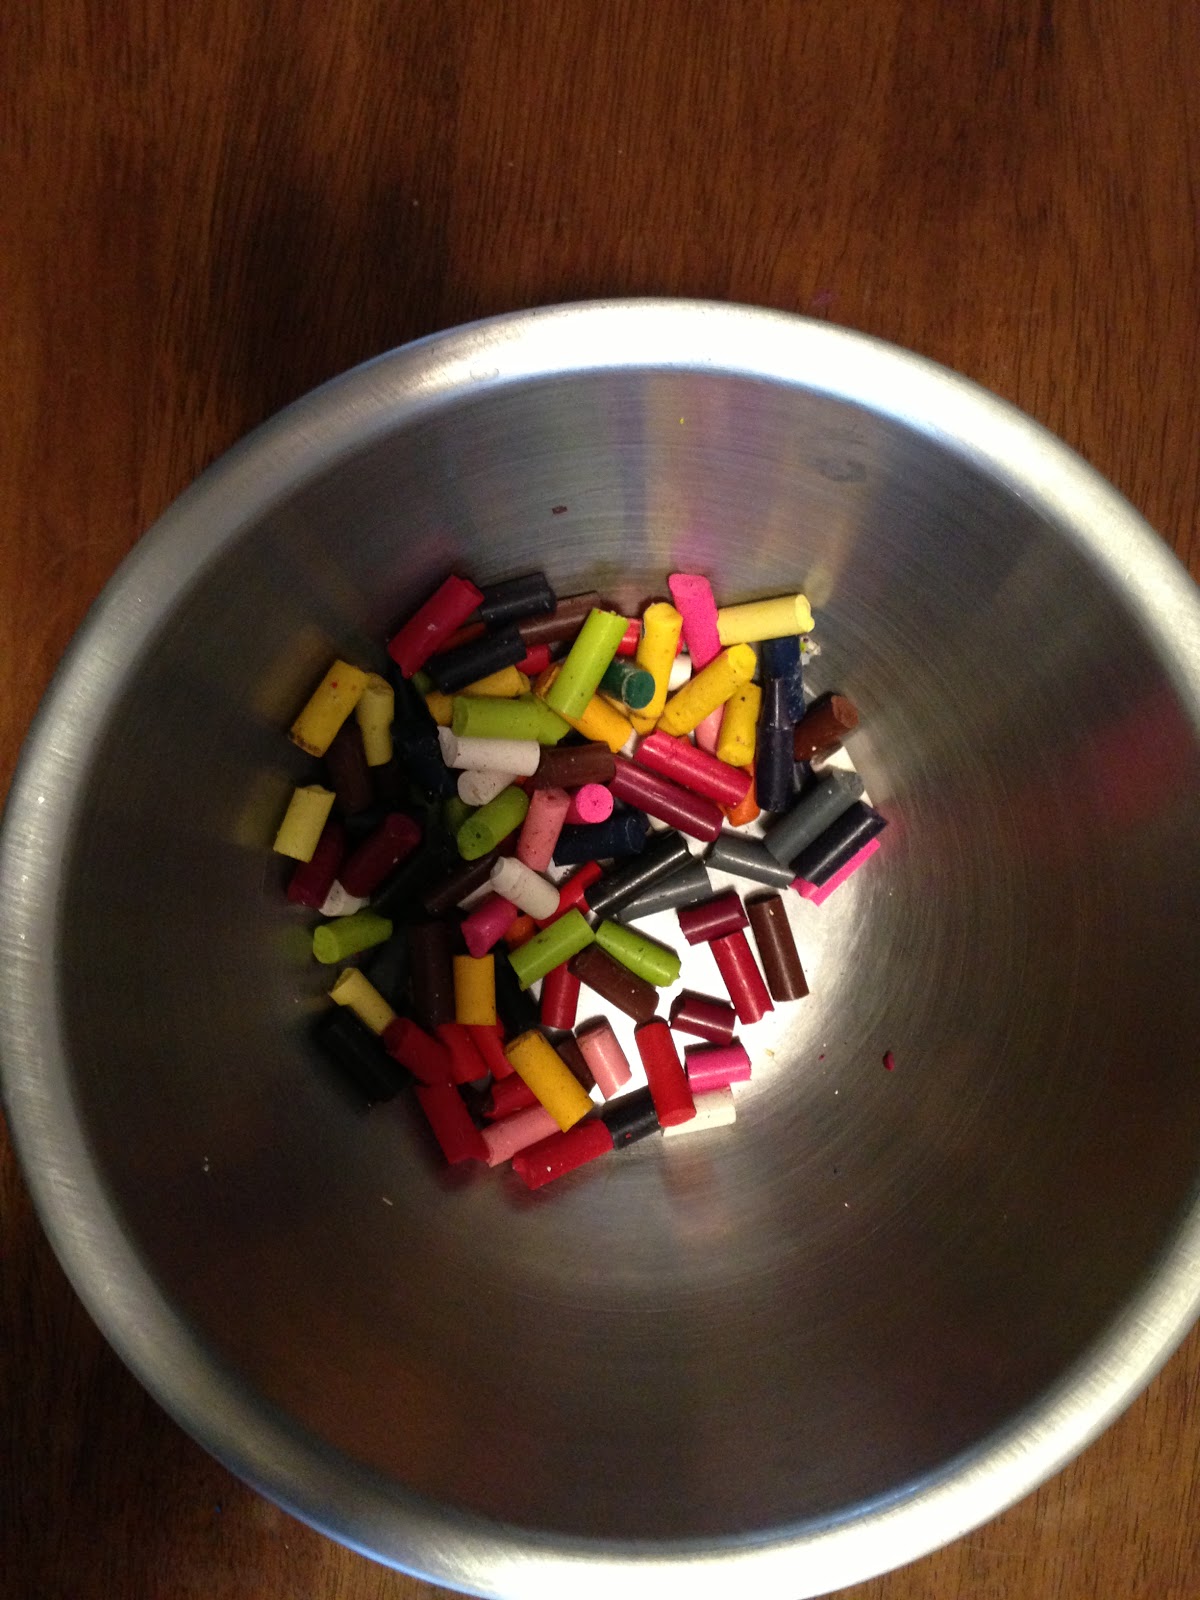
Remove any paper off the crayons and break them into little pieces in a bowl.
 So I'd like to say that we just had all these broken crayons around that we re-purposed into better crayons.... but truth is, that's not what happened. We needed a TON of crayons so we had to break into the stash of new crayons. Setting to make 50 some Valentines, you need a lot of crazyon. (Yes, I said CraZyon, because that's how I was feeling when this was all over, like a crazy crayon lady.)
Go get your crazy on.
 
Ice cube tray that you get from Michael's.
 Yeah, so it's an ice cube tray and I stuck it in the oven. I was a little worried, but it seemed to work up to 230 degrees. I got the cupcake shaped ones first, but they were humongous and there was no way we were making that big of a crayon for everyone. Even if it would have been total cool.
 
Crayons in the tray.
 You really need to pile them on, but not over the edges, they melt all over the place, and don't plan on actually using these trays for ice when this is over. Unless of course you like crayon in your iced drinks.
But this is how they look before you stick them in the oven at 230 degrees for what was supposed to be 15 minutes a batch, but really seemed like 30 minutes to get a good melt.
 
Chevron print card stock paper.
 We got this cute little card stock paper to fold and tape the crayon to inside, and make into "Valentine" Azalea worked really hard to make sure that each of her classmates got a color that she thought they would like best.
 
Example of our original message.
 The message was supposed to read
"Happy Valentine's Day, for Crayon out loud"
but Tigo was too embarrassed to write the joke,
and Azalea was too busy drawing hearts everywhere.
 
Out of the oven.
OK, these took forever to cool. I even stuck them in the freezer for a few minutes. I wouldn't recommend doing that though. I think it messed up the consistency of the melted gunk.
 
Close up of hot melted crayon.
 These really looked a lot cooler on this side of the crayon than the flipped side, which was shown on the card. Oh well.
 
Little crayon hearts layed out like a flower after they've cooled.
 
Finished product.
So this is what they looked like at the end, but for they got bagged up and sent away. I could have made the finished product look more "store bought", but then that would have been me making them (or buying them) and not the kids actually making them. So. The kids are gone now, probably sharing their cards. I hope none of the other kids think that it's candy and try to eat it... you never know. I am also really hoping that they come back with some other fun cards, but if nothing else, I'll steal some of their candy that I'm sure they will have from the day.
 
Happy Valentine's Day folks.
 

Saturday, November 12, 2011

Rag Rug with Love

Ok, anybody who has known me for a while, knows that I HATE (yes strong word) to get rid of things. I don't like to think of myself as a packrat. I do hate clutter. But I don't like throwing anything away if I think that it has another life somewhere else.
A beginning pile of fabric cut into 2 inch wide strips before being sewn together end to end.

This was the very beginning. Before I knew what I was getting myself into.
Handme downs are awesome. But now that my child-bearing days are over I have a bunch of clothes that I can't necessarily give to other people.
Before the braids got a chance to make to the rug,the kids got a hold of them and wrapped up my head.
Braided rug. Braid head.
 It's one thing to give your own child the older siblings old shirt with the stains, but another family's stains don't work as good when you are passing along clothes. Nor do soccer jersey t-shirts. 
Here are some of the many rolls that I have created to braid, braid braid.

And it's pretty easy to fold right up and put away when I'm not doing it.
(Though I really like seeing it out.)
Sooooooo, in the spirit of reusing, I've been working on a braided rag rug made entirely out of old clothes that might not have had another life, except as well... a rag. Stains are hidden. Holes are avoided and Floors are covered.

You can see the braided strap that has yet to be attached.The fabric was connected in No order. Everything was completely random.

It's still growing. And growing. It has definitely been a labor of love.
I could tell you a story about each one of the materials in here. Who wore it. Where it came from. How long it's been there. What stains where on the shirt. How soft it was.

Monday, November 7, 2011

Skirting the issue

Ok, so sorry to do it this way, but I'm looking for some feed back on the skirts I've been making.

I've been sewing off and on since high school, and have  just been making gifts and things for my kids. I'm ready to move on and make more, but need it to be the right thing.

Please be brutally honest, I'd really rather have honest feedback and do the right thing than to have nice comments and do the wrong thing.

Please let me know if your daughter would wear these. How old is she?
Would you ever purchase something like this? (I'm not asking you to buy it, just whether or not you would.) How much would you pay for it? Honestly. (overpricing is no good, nor is underpricing for that matter) How much do you think it should sell for, if anything?Is there something that you see that you like, or DON'T like? Also, do you shop on etsy.com ever?

These particular skirts are made from up-cylced materials with appliqued designs. There is a two inch elastic waist band.

I've got lots of other stuff, but depending on feedback I'd like to start here.
(also, I'm just learning to take pictures of this stuff, so it doesn't come out so good)
I've put the measurements of the waist and length down. The waist measurement is when it is Not stretched out. These babies give quite a bit. Allowing a lot of years of wear and growth.

Thank you, thank you, thank you in advance!!

18" waist, 12" length
Upcycled from a thin cotton sweater


Waist is 19", length 11"
So I said they are appliqued, but this one isn't. The center stripes are sewn in seperating the skirt.

The purple material is a polyester breathable material.


19" waist, 10"length
Cotton blend with heart applique

20"waist, 13" length
More of a spring summer look than fall. But it's a cotton blend with lemon applique.


Closer view of the waist band

21"waist, 14.5"length
Tried a little different technique with the top. Only the very top red blend portion contains the  2" elastic


Thursday, November 3, 2011

Baby loving

So here are some baby gifts that I sent out earlier this fall. Pretty much the same idea. With a spruced up burp cloth/ travel changing pad with a personalized shirt with an original applique and super awesome reversible pants.
I have to say that I absolutely love each of these.

Sock monkeys are one of the mama's fav things.

Shirt pant set. with cute little side pocket matching the reversed side.

Banana applique. Yum.

Can't tell from these bad pictures but the pants are reversible with the banana fabric. The pants can also be worn for a long time as the babe grows since the pant cuff can be folded up and the waist is stretchy elastic.

Skull & cross bone applique for the tough little newborn.
Actually this set was made large so it could be worn as the babe got a little older.

Matching burp cloth.

Shirt and cloth combo.

Totally my favorite pants ever. Wish I could get away with wearing soft blue velour pants with reversible skull and crossbones. I'm afraid as that the only adult who could or would get away with this might be a pirate. (or Hugh Heffner)

Unknown gender of the newborn. Forget pink or blue, lets go with Red and Orange.

Parents met and made baby in California. But moved to home sweet Virginia to have and raise babe.
Love having the two states there.

A little closer view.

Again reversible pants. Super duper soft fuzzy brown cotton and smooth batik interior.